Screenshot in Windows 10: Procedure and location.
The question of where to save screenshots on one’s own computer has accompanied the Internet and PC community since Windows 98 (and much longer). Almost since the beginning of the Windows era, it has been possible to create live images of one’s own screen, so-called screenshots. Screenshots can be used to capture certain situations in video sequences, in games and movies, or classically on websites on the Internet. Once you have found an exciting website and want to create an image of it, you can make a screenshot on your computer within a few seconds.
Make screenshot by keyboard input
If you want to take a screenshot of your current screen content, all you have to do is press the „Print“ key on your keyboard. Exactly at this moment an image of the currently visible area will be created. You will not see any confirmation or message on the desktop. Instead, the screenshot is parked in the so-called clipboard or cache of your computer, to be inserted from this point then in a program or tool of your choice.
Browser addon for screenshot
For Safari and Google Chrome, there are now numerous tools and extensions that you can install to take screenshots of certain content and web pages via automated function. The selection is so large that we don’t want to make a recommendation here. Look for „screenshot“ in your extensions and test some of the extensions offered to you. Modern browsers with the latest updates now even have a native option to take screenshots. In this way, you can create images of the current screen content without any additional tools and save them on your computer.
Screenshots via „Cut and Sketch
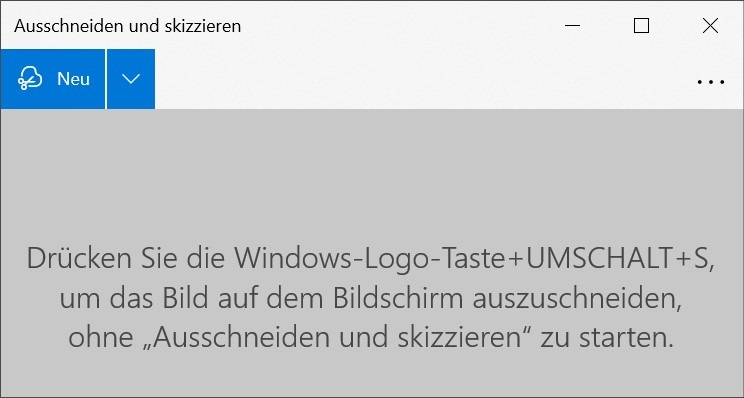
The „Cut and Sketch“ function is certainly still known to many users as the „Snipping Tool“. And if you have an older version of Windows installed on your computer, this function may still be called that. By clicking on the Windows logo and typing the term „Cut and Sketch“, a small, native tool opens up that allows you to take a screenshot directly.

Formerly known as „snipping tool“: The program „Cut and sketch“.
The big advantage: You can also take screenshots without starting the tool. The key combination Windows-Logo-Key+SHIFT+S opens the screenshot mode. This way you can draw a frame around the area you would like to save via screenshot. After you release the mouse and define the frame, exactly this area will be opened in a new window and can be saved to any location on the computer. You can define this yourself in this case by clicking on the diskette icon (save).

By clicking on „Copy“ you can put the created screenshot into the clipboard, for example to open it in another program.
Location of screenshots
Back to the initial question: where are screenshots stored in Windows 10? While we have now sufficiently illuminated the procedure for taking screenshots, the question arises as to where screenshots are „physically“ located when they have been taken, for example, by clicking on „Print“, by typing CTRL+C or by clicking on „Copy“ in the „Cut and Sketch“ tool.
Screenshots in the clipboard
This is called the clipboard. This is an English term for the German equivalent of the clipboard. The term comes from electronic data processing and is nothing more than a so-called virtual clipboard on your hard disk. The screenshots are thus stored in the clipboard and can be pasted from there via „Paste“ or „CTRL+V“ for example in Adobe Photoshop, Gimp, Irfanview or Microsoft Paint, in order to be further processed and saved from there.
If you were to restart the computer after taking a screenshot, the cache would be cleared, so you would no longer be able to access the contents. So it is important that you „process“ the clipboard contents directly and paste them where you want them to appear. Of course, this can be one of the mentioned image editing programs. But also Whatsapp web, new emails, clouds like Dropbox or Google Drive, and other messenger services can be as recipients for these cached images.
And the location on the computer?
So the clipboard allows you to save temporarily and briefly, as well as transfer files from one place to another. From an image editing program, you can then of course freely decide where you want to store your inserted content. The image folder in Windows is at least as suitable at this point as in short-term „parking“ on the desktop or saving directly to an external medium such as a hard drive or USB stick. This is completely up to you and can be defined once as the default, but also for each file anew.

